Build the future

Using Hardhat to Build on MetaNova Verse
1. Make sure to go to their official page as well for additional guidance on how to set up Hardhat to your local machine by going here:
https://hardhat.org/hardhat-runner/docs/guides/project-setup
2. Once you have your Hardhat ready, there are 3 files that you will have to edit. First, create a Solidity file under the contracts folder. You can right click on the folder and create a new file. For this example, we named it HHToken.sol
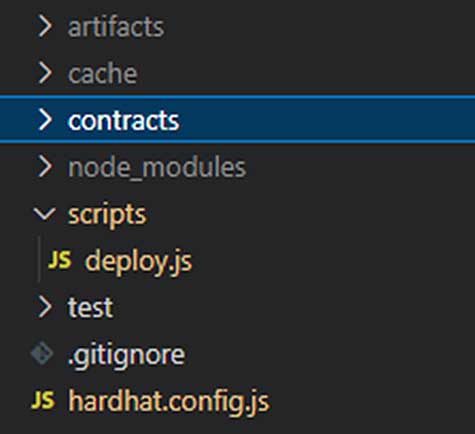
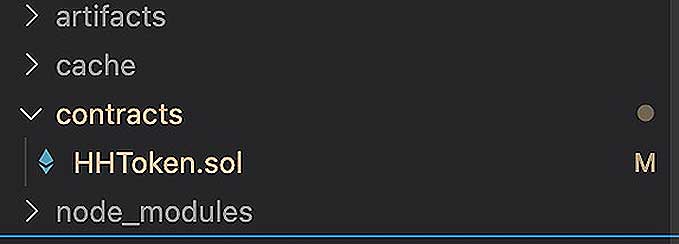
3. Paste thispiece ofsimple contract code in your HHToken.sol equivalent file:
// SPDX-License-Identifier: MIT
pragma solidity ^0.8.2;
import “@openzeppelin/contracts/token/ERC20/ERC20.sol”;
import “@openzeppelin/contracts/token/ERC20/extensions/ERC20Burnable.sol”;
import “@openzeppelin/contracts/access/Ownable.sol”;
contract HHToken is ERC20, ERC20Burnable, Ownable {
constructor() ERC20(“HHToken”, “HHT”) {
_mint(msg.sender, 1000 * 10 ** 18);
}
function mint(address to, uint256 amount) public onlyOwner {
_mint(to, amount);
}
}
4. Once you’re done, go to the scripts folder, then look for deploy.js. As part of the setting up Hardhat, there are already some lines in the that file. You will just have to edit some variables like the ones below:
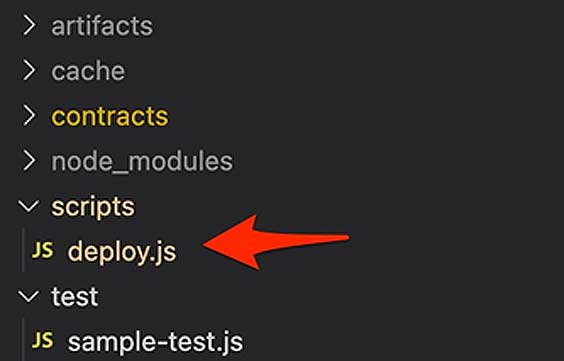
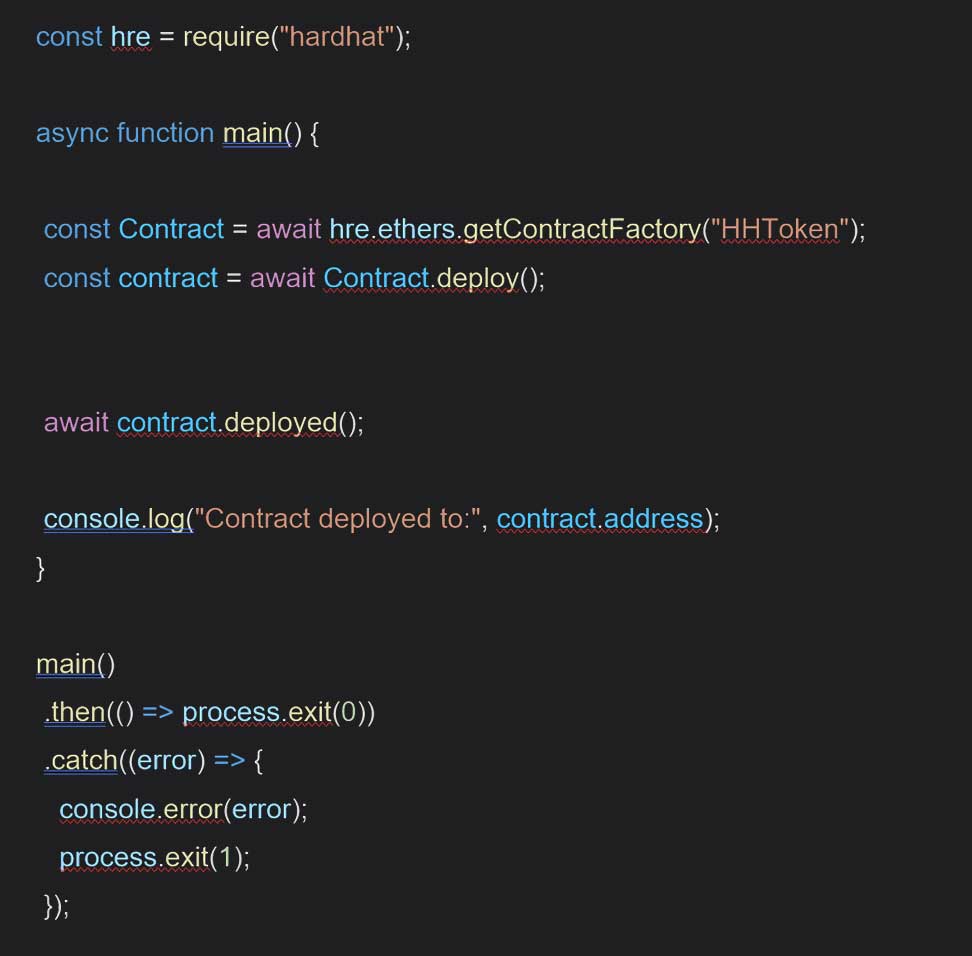
5. In the main folder, look for a file named hardhat.config.js make sure that the Metanovaverse chain details are configured. At the lower part of the file, you should see the module.exports section. You might have several chain configurations there, just add Metanovaverse in the networks object.
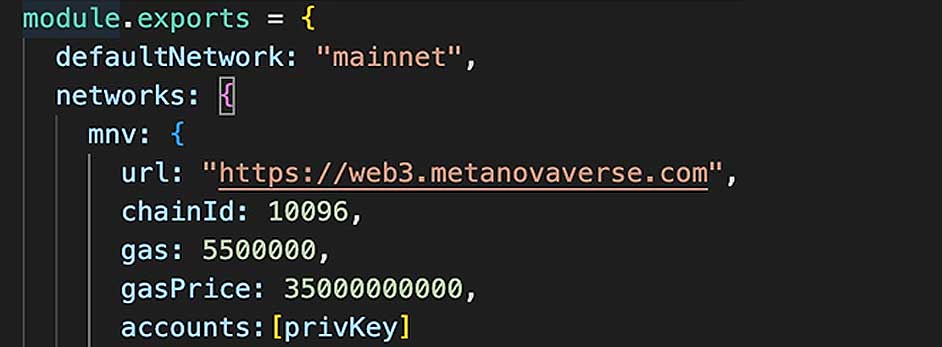
For the private key, this is the private key of the wallet that you’ll be using as the developer of the contract. You can extract this from your Metamask wallet. Make sure that your account in Metamask has some MNV tokens in there for gas.
6. Once everything is configured, go to the terminal (in MAC), or terminal in VS Code or Command Prompt (for Windows). Go to the folder where your hardhat project is then type in the command:
npx hardhat run –network mnv scripts/deploy.js

7. This compiles and deploy the contract HHToken.sol and will return a contract address of the result. You can also check copying the address then go to https://explorer.metanovaverse.com/ to paste it.
Using Remix
1. Go to https://remix.ethereum.org/. Make sure that you have the Metanovaverse Network added to your Metamask and a few MNV tokens are in your wallet to be used as Gas for creating a smart contract.
2. Create a new file then call it MyToken.sol
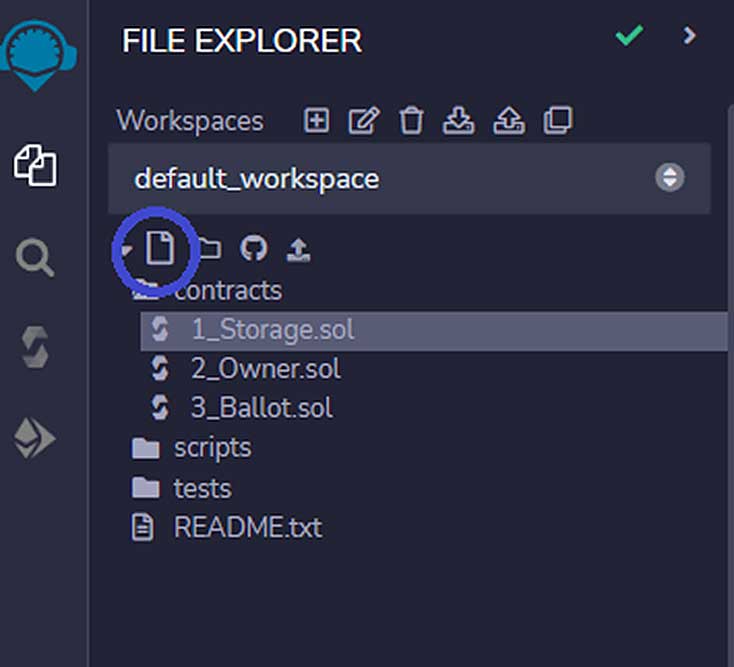
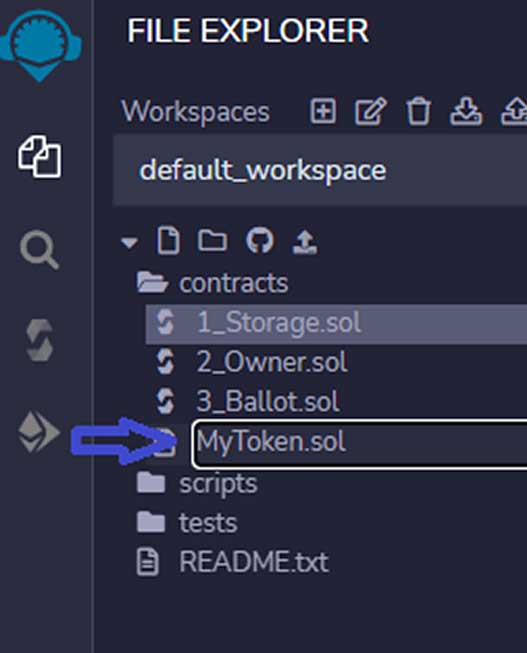
3. Paste this sample solidity code
pragma solidity ^0.8.2;
import “@openzeppelin/contracts/token/ERC20/ERC20.sol”;
import “@openzeppelin/contracts/token/ERC20/extensions/ERC20Burnable.sol”;
import “@openzeppelin/contracts/access/Ownable.sol”;
contract MyToken is ERC20, ERC20Burnable, Ownable {
constructor() ERC20(“MyToken”, “Myt”) {
_mint(msg.sender, 1000000 * 10 ** 18);
}
function mint(address to, uint256 amount) public onlyOwner {
_mint(to, amount);
}
}
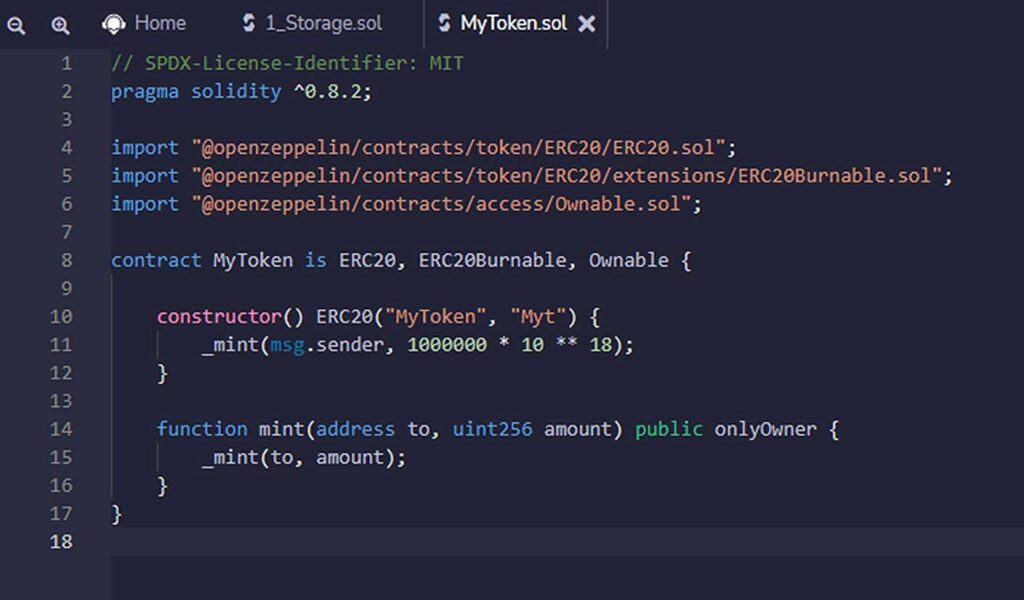
4. Once you already have the MyToken.sol file, look for the Compile icon on the left navigation panel of Remix – the 3rd icon. Then click on the Compile button.
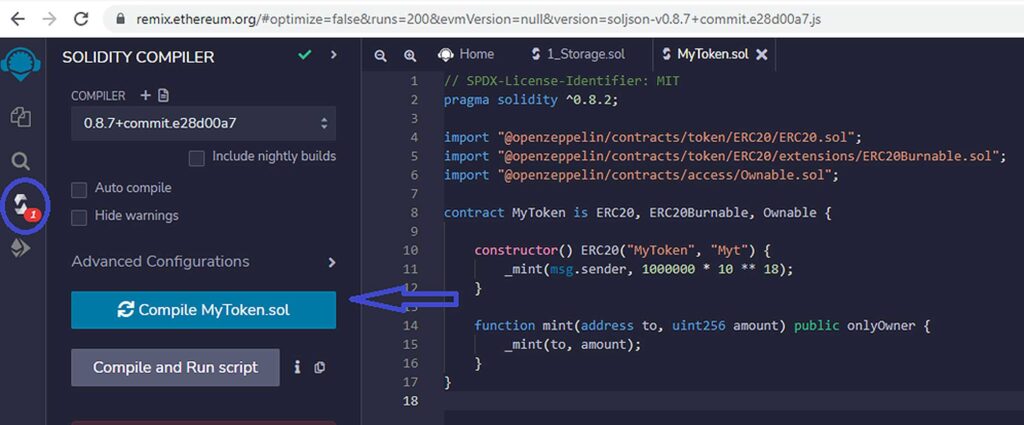
5. To Deploy, click the Deploy button on the left which is the 4th icon in Remix. For the Environment, select Injected Provider – Metamask to use your Metamask wallet in deploying the contract. Make sure that the Metanovaverse Network is selected and the chosen wallet has MNV in it for gas fee coverage.The ether there represents your MNV tokens in your wallet.
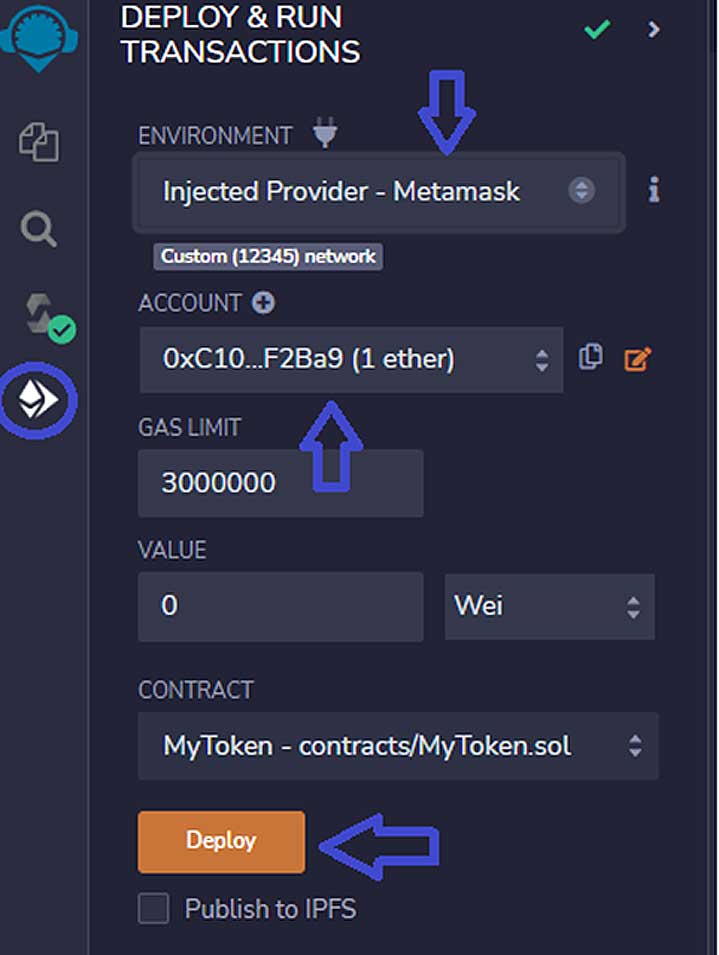
6. Once you click Deploy, it will open up a MetaMask window where you’ll see the gas fee needed for deploying the contract. Click Confirm for the contract to be deployed.
7. To see the contract address of the deployed contract scroll to the lower part of the screen then check the Deployed Contracts section.

8. You can copy the contract or see the transaction. That’s it, you now have a deployed contract using Remix.